



Construction Lumber Workbench
Scott Walsh
Couldn't load pickup availability
This is a perfect first workbench for the beginner woodworker. Made from easy-to-find construction lumber, this bench is not going to break the bank, coming in at under $200 for all the materials.
These 20 page, step-by-step plans take you through the entire build from start to finish, with detailed renderings of the whole process.
*Imperial plans only (no metric, sorry).
**These are only available as a .pdf. In other words, they are NOT printed and mailed as a physical product.
Details
About the Plans
About the Plans
Tool Requirements
Tool Requirements
Supplies
Supplies

You Might Also Like:
The Evergreen Workbench
A Woodworking Project Video Course
Ready to build a sturdy, versatile, and affordable workbench? This beginner-friendly video course guides you through the process of constructing this affordable workbench. Learn essential woodworking techniques like half-lap joinery while building a bench that will last a lifetime.
I built the 2x4 table, and came out very nice, I do have a few pointers:
I had never done half laps, the way Scott does and teaches how to do them makes a lot of sense and following the same steps will produce great half laps.
The amount of glue needed will not cost ~$5.00, you'll need at least half a gallon worth of glue, still, nothing even a novice woodworker should be surprised about.
I only own 6 clamps that could be used for the purpose of this project, so I skipped the cauls thinking I can simply plane the laminated sections straight, I was wrong, after ripping 2x8s into 2x4s, some of those studs release tension and bow on the thinner side (the side that needs to be caul clamped straight), I figured I could simply plane them back straight, I even tried the trick of using a planer as a jointer by temporarily hot gluing a flat board/surface to the laminated section, still, due to how thin (3/4") the straight board was, it didn't make a difference as it tended to mold to the bow anyways with the pressure the planer places on the board (my bad I should've used a buttload of shims to prevent this), so it was a struggle to make this work.
So consider this before attempting this laminated top, Scott does have other newer workbench videos/plans where minimal use of clamps are needed for the workbench where he uses an MDF board for the tabletop.
In the video Scott also laminates half the table top on his 16" planer, a heads up of the amount of weight would've been nice to account for help, I have a 13" planer, so I had to do three 10" sections instead of two like Scott did, and even those smaller sections were 43 lbs each, and somewhat cumbersome to maneuver, especially when all three were joined together.
At any rate, overall the full experience was good, much better than what I would've achieved w/out plans, the resulting workbench is great if only I struggled a bit with the bowed studs, I'm now the proud owner of a sturdy and stable workbench, I especially love the half lap unions that make it look clean and professional made.
Except for the casters, I followed Scott's advice on the hardware with the vise and heavy duty leveling feet (get these, you'll regret it if you don't), and placed my new workbench behind my tablesaw, it's really good to have a solid workbench I can go to town with my woodworking.
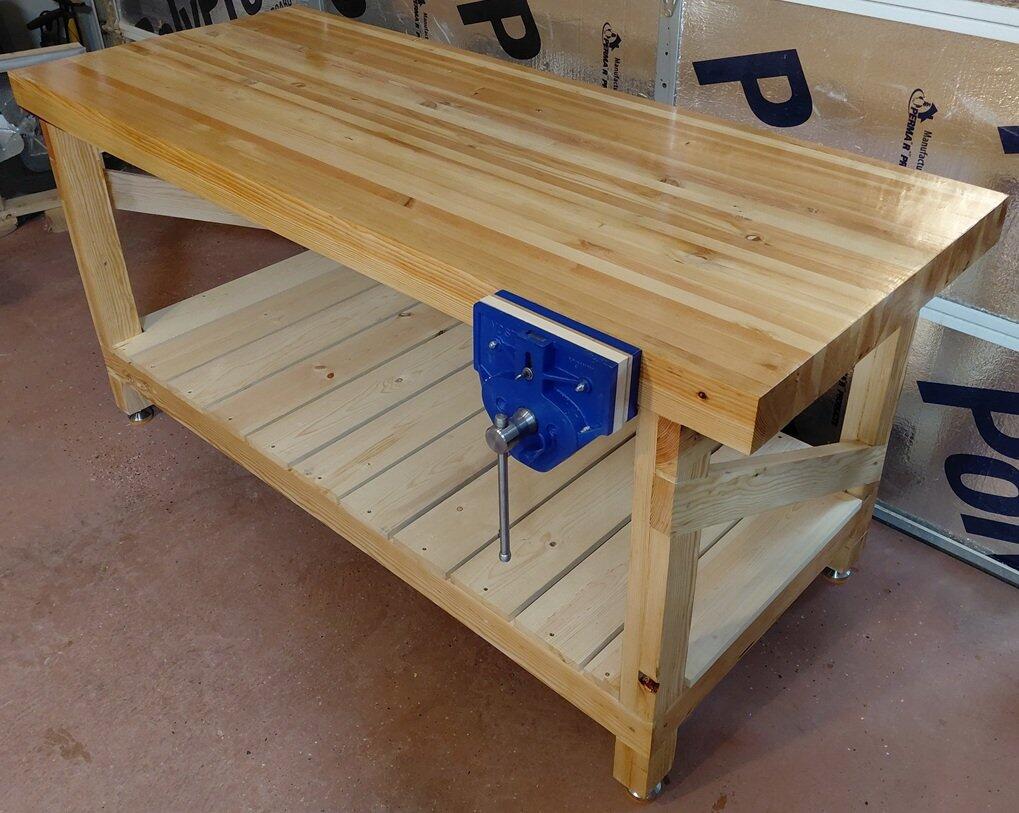
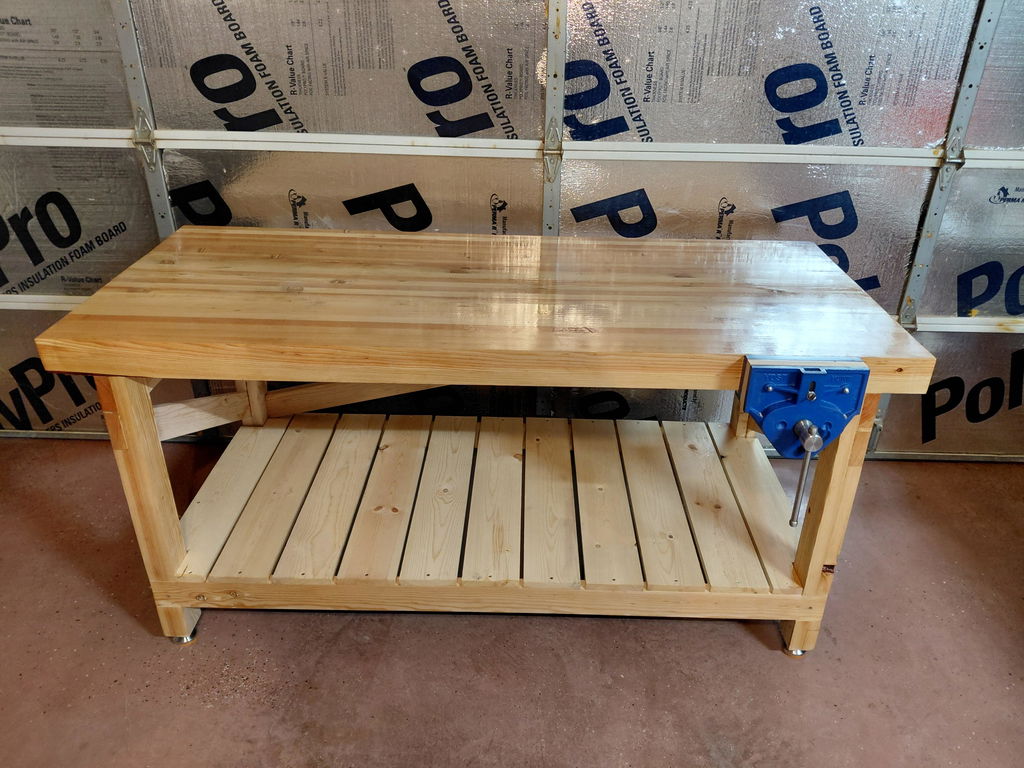
All good Scott.
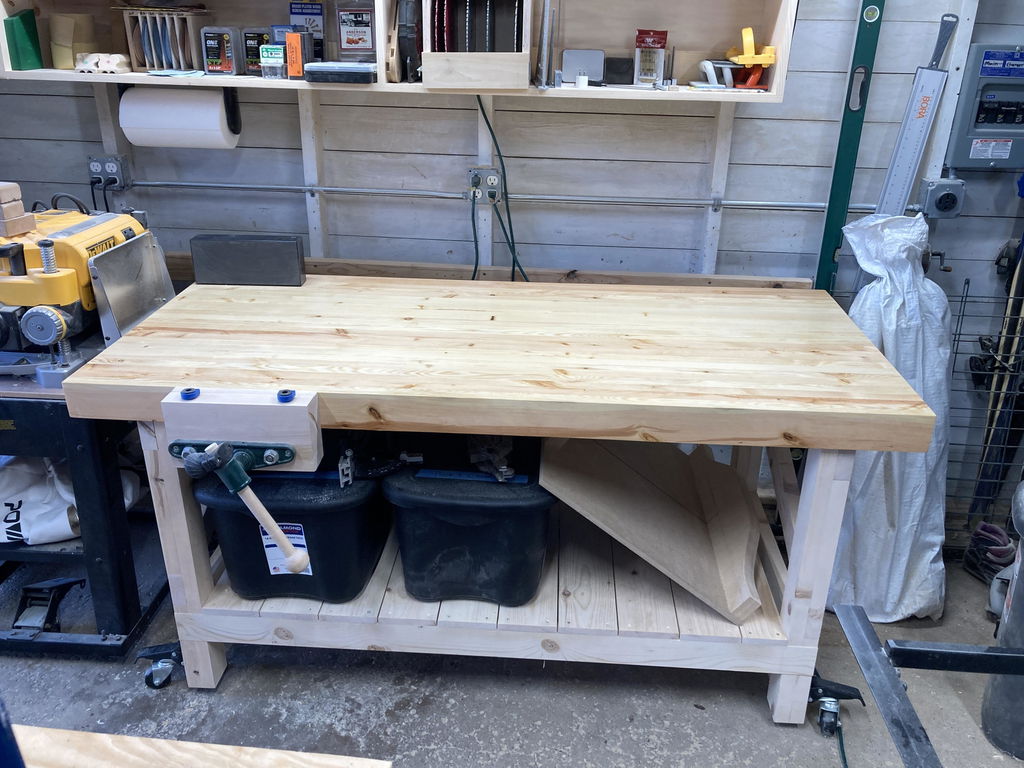
Great workbench build, but it will give your planer a workout. I built this a bit differently than Scott. Since I only have a 13” bench top planer, I built 3 sections and used dowels to connect them. I did not like the bolts to connect the top, so after a quick consult with my Woodcraft rep, I went with an angle and Z-Clips (see photos). I also did not use the rear brace. The bench is incredibly sturdy without it. Finally, I was debating between drawers versus a bottom shelf and opted for the latter. I have a very small shop (yes Scott, even smaller than yours), so everything needs to be mobile and packed up for winter. Thus the casters and leveling feet. Overall, I highly recommend this build. For my purposes, at least, it will be perfect. P.S., that is a steering wheel spinner on the vise. Great idea I got from a different YouTube video.
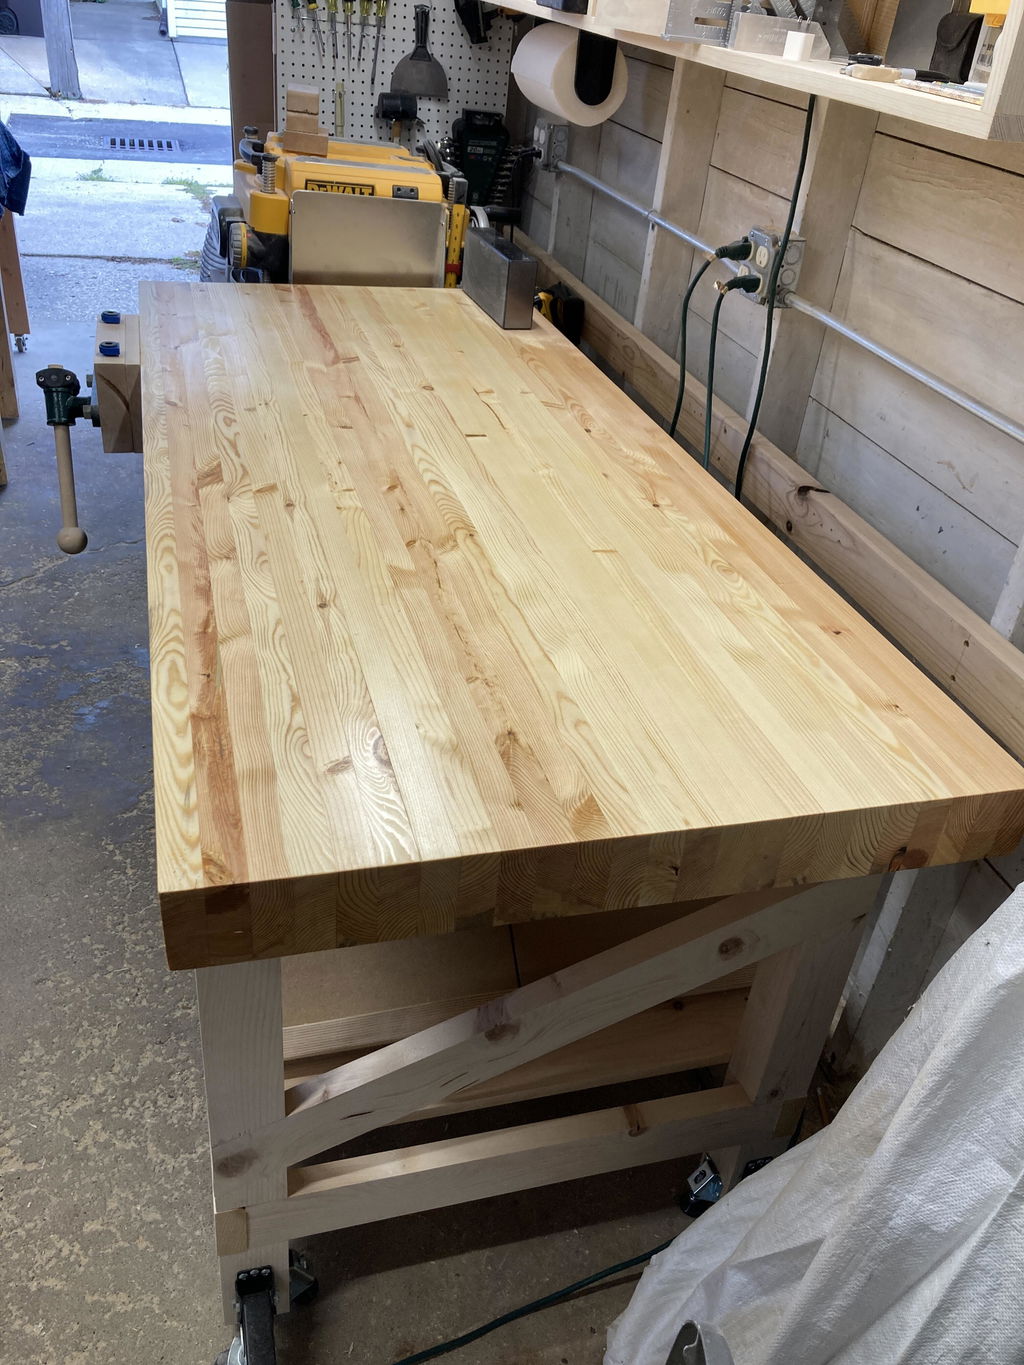
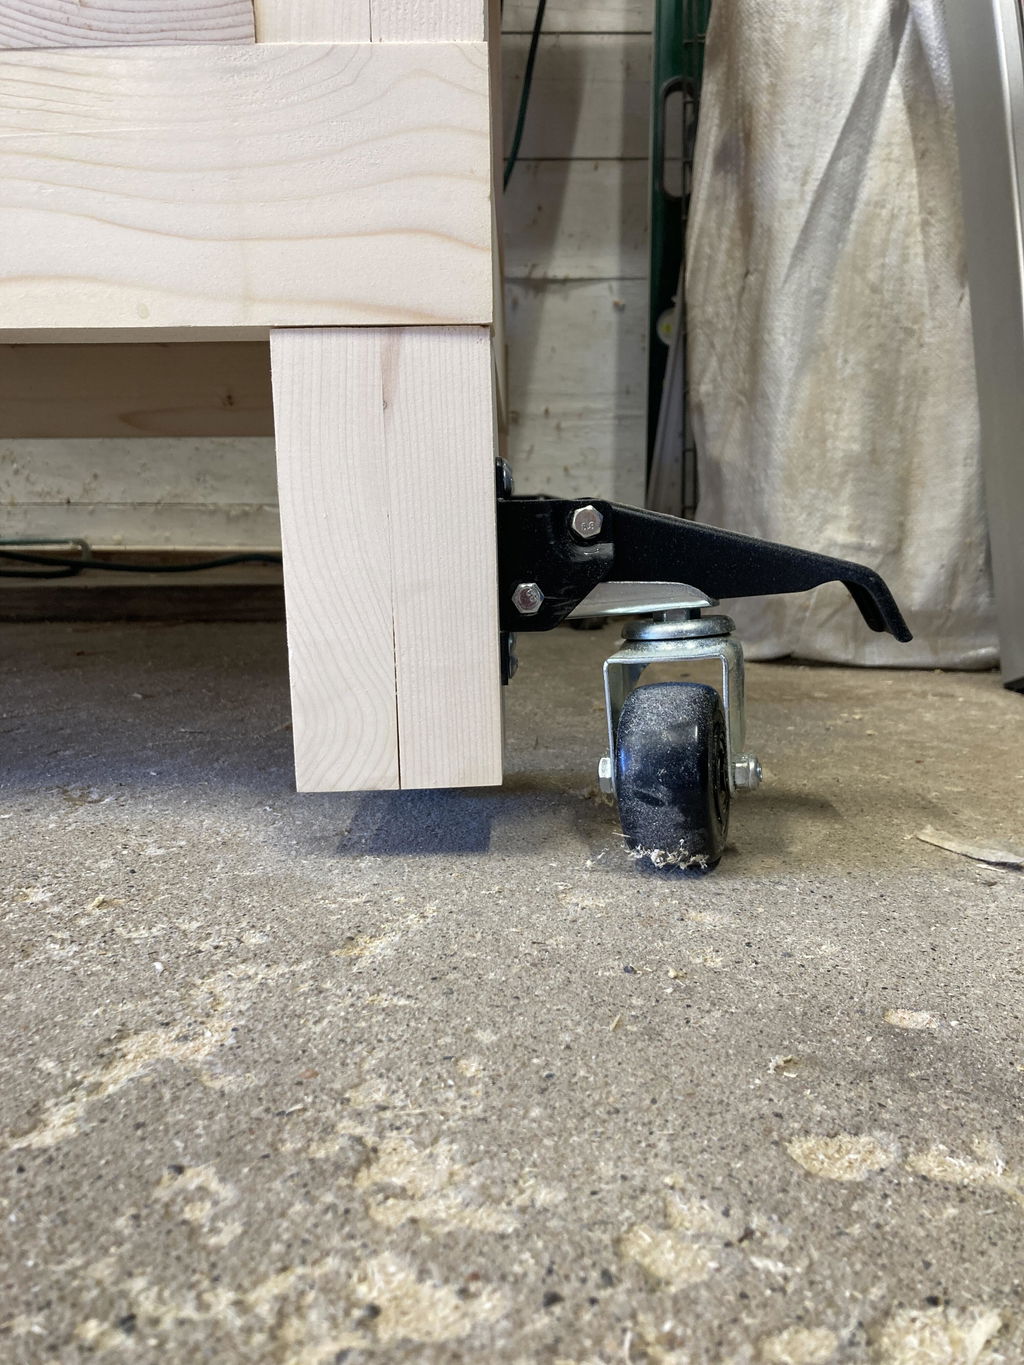
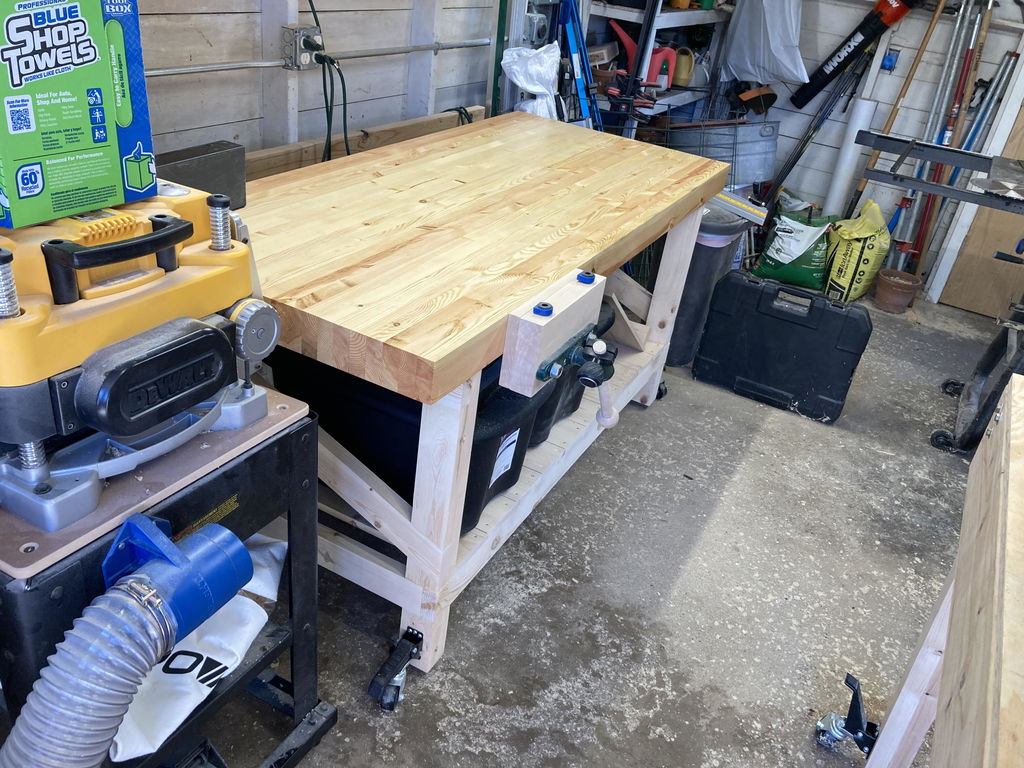
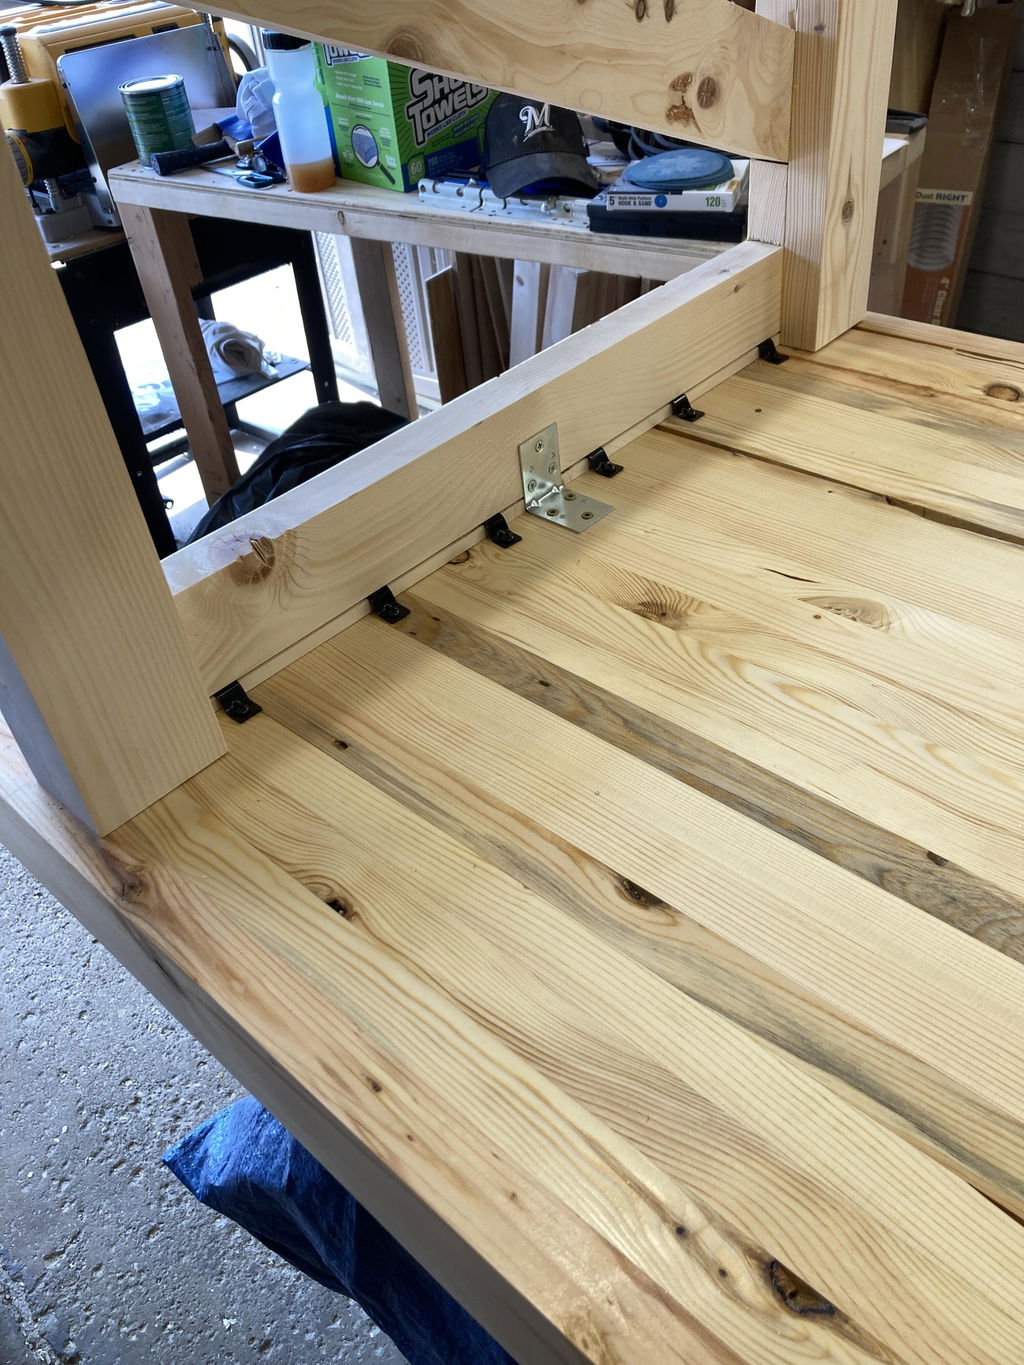
Great plans. Lots of detail, but not too much. Just enough challenge.
I am building this workbench to learn skills to build an outdoor buffet table and benches for the grandkids to use on the deck of our Cabin. Fastening the top so it is free to expand and contract is key. I have the workbench top completed and am planing, sanding, staining and varnishing it. Base ends are made. Still have long stretchers, attach workbench, and the final diagonal. There are a few points in the both the plans and YouTube video where "magic happens here". I will say this, the second time I do everything it fits snug and flush. The first time not so much, and that is after a rehearsal on scraps.
Content was easy to understand and was explained very well. I am going to use this to construct my own workbench.
Keep up the great work!
Emilio V.
I like the plans for the most part.. The cut list is a little hard to follow what you are cutting for so maybe follow up the abc labeling on the parts in the subsequent pages. Also I 'm modifying the plans quit a bit. The size dimensions and the top construction is very different so some reference what might need to be done if for instance if one used MDF for the top or plywood for the legs. That is if you ever considered it. Like your videos.
There was not much I learned from the pdf that I did not learn from the video. PDF could’ve been way more detailed, especially considering that this marketed towards beginners. There was no real/detailed mention of how to get the wood ripped and squared.
I will be moving to a new place in a couple weeks, and for the first time in my life I will have a dedicated workshop space. My first build will be this bench. I'll be making minor adjustments--I want a couple shelves and a solid vertical backer behind them, so I won't need the long diagonal support on the back--but the benchtop especially looks like the best idea I've seen anywhere. I was worried that 2x8s would make it more costly, but when I priced it out, they're about double the price of 2x4s at my local box store, so no reason not to do it right! Thanks to Scott for this great plan.
Simple and easy to follow. Makes for a great project.
I would like a larger table but you did not offer any suggestions to enlarge. One thought you may want to consider is the same construction ideas but make it modular so multiple tables can be linked together
Scott,
Good video and plan, and I think for a "newby", like me, both required for best outcome. I modified bench dimensions some for my size shop and will use bench for assemblies, etc so my top will be 3/4 MDF for flatness + laminate.
COMMENT -
For bench side assemblies, use of glue makes joints unmovable so the need for side diagonal braces seems a little overkill, though the brace for back of bench makes sense to me. But agree braces required if jointing with bolts, screws or nails. *Your thoughts?*
Thanks!
~Phil
I watched the YouTube video on this bench and was impressed enough to order the plans. I wasn’t disappointed. Color images and plenty of them make it easy to follow the directions, and cut sequences conserve the amount of lumber needed. Well-recommended.
I did not build the work bench yet. Gave 4 stars. Only because bench is not completed.
I love the Scott's design and his video, cut list, and sense of humor. I have started on the workbench but am making it out of 2x4s as I can get them for free. I do appreciate his warning to check the end grain and be careful not to take one cut from the center of the tree. i will follow this with pictures of the bench later. By the way, it will be 12 feet by 23 inches. It will go under my wall cabinets than i will be building a 3 foot by 8 foot actual work bench for my bench tools -- using his plans.
Maybe im missing something and didn’t see it but wish it came with a step by step detailed video… the YouTube video is great but doesn’t go step by step (detailed) and the plans seem a little vague to me. I’m a visual learner and it would be nice to get a detailed step by step video link with sectioned off time stamps to make it easy to navigate.
As a beginner woodworker, I found that the instructions are detailed and easy to follow. I am about half way through the project and it is coming along as planned so far. It helps to refer back to the video from time to time to avoid mistakes.
Construction Lumber Workbench
Construction Lumber Workbench
While my build is different (bench top and dimensions) the Scott's plans are really clear in showing how to build the legs and bracing. They've made it much more understandable in where and how to join the legs and bracing.
I’m new to woodworking (besides 4 years of woodworking in high school) and of course I need a table! I looked at a lot of plans and videos but I was sold on this set because it is rather straight forward to build and he has the video to go along with the instructions which the instructions are great quality and in color. If you are just starting off I would recommend this setup. I cannot comment on the complete build yet as I haven’t finished it yet. It does require owning a lot of tools, some expensive if you want this to come out right. One thing I learned the hard way is my local “Blue” depot doesn’t cut 2” stock. So I had to figure out how to get some very long boards home even with my pickup truck. I don’t know if the “Orange depot” cuts 2” stock or not. Sure would have saved me a lot of trouble. But that’s not the fault of Scott or the table. Just something you may want to check with your lumber supplier if they can do to save you some time and work. I have the tools to cut it myself but the sheer length of the stock with my bench top tools makes it difficult to get the project started. So if you have the basic tools already (table saw, router, planer, circular saw, lots of clamps etc. this is a great build. Like Scott stated in the video you can get away without using some of these tools but it’ll make your project that much harder and more likely to be sloppy or not square. I plan to work on it more this weekend!
I have not built the project yet and I will be producing a SketchUp model and drawings specific to my application before I start. This will be based on your plans especially the use of construction lumber.
Construction Lumber Workbench
This plan is extremely well laid out and illustrated with everything you need to complete the project. Highest quality.
When I purchased this, I was expecting great plans and building directions. I was not disappointed...
- Choosing a selection results in a full page refresh.
- Opens in a new window.